About Mastering and Enjoying Home Cooking. Drink, Cook, and Live Well!

Friday, December 22, 2017

Holiday Prime Rib Roast or New York Strip


Please read this recipe two weeks ahead. If dry aging you need to plan for the time it takes. Order you meat ahead of time so you have time to shop for a good price. Prime rib roast is available from grocery stores during the holiday season at a discounted price. The rib roast is available with or without bones.  When this roast has the bones in it is called standing rib roast.  Because the meat is always sweetest near the bone it is the preferred roast for prime rib.  Prime rib is an absolute favorite at my house for Christmas.  Prime rib is so good it needs very nothing more than salt-and-pepper and the right treatment.  The recipe is practically foolproof unless you plan to play a simultaneous round of golf or decide that this is a good time to finish off several bottles of wine. The New York Strip roast also is very tasty and is prepared essentially the same way.

 
Snakeriverfarms NY Strip Roast

A full rib roast  consisting of ribs 6 through 12 is often cut and sold as two separate roasts known as the first cut (small end) rib roast and the second cut (large end) rib roast. The small end rib roast includes ribs 9 or 10 through 12, which is next to the loin. The large end rib roast includes ribs 6 through 8 or 9 and is next to the chuck. The large end is very tender but its proximity to the chuck means that it is slightly less desirable than a first cut rib roast. A four rib roast should feed between 6 to 8 people on average. Each rib is approximately 2 pounds after trimming by the butcher. 

The words "Prime Rib" simply refers to a rib roast not that is graded "USDA Prime". Prime grade rib roast is rarely available to the generally public unless it is specially ordered. Most rib roasts sold in food stores are graded “Select". The next better grade is referred to as “Choice”.
 
Snakeriver Farms Standing Rib Roast
Wet Aged or Dry Aged, USDA Prime, Choice or Select Grades
 Dry aged beef is the best and available only through special order. Dry aging causes the beef to loose some of its weight while the meat flavor intensifies and is more beefy. Wet age beef is vacuum packed in plastic hence it is incapable of losing any of its weight to liquid loss.  Wet aging is inferior to dry aging but less expensive. USDA beef graded “Prime” is top quality and represents only about 2% of all the beef that is sold. Prime has the most marbling, which makes it the most flavorful and tender. USDA Prime Dry age prime rib is about $35 per pound. USDA Choice wet age prime rib is about $12 per pound and is still an excellent and tasty grade of beef. The typical grade found in most food markets is graded USDA Select which is much less costly than Prime and Choice but will not be nearly as flavorful or tender and is about $7 to 9 per pound but may be much less on sale during the holidays.

While some markets will hang your roast to dry age for free, many do not have the facility to do so. You can dry age your roast yourself for a 2 to 5 days uncovered in the refrigerator to bring out additional flavor and produce a more buttery texture. This allows the natural enzymes in the meat to break down some of protein and connective tissues in the meat. Trim off any dry spots before cooking.

The Slow-Cooking Method is the only one used here because it produces the best results. In the slow cooking method, the meat is seared at high temperature, then subsequently roasted at low temperature until its internal temperature reaches the degree of doneness.  When any cooked roast is removed from the oven, its internal temperature will rise.  For this reason, the roast is always removed at a temperature lower than the desired final target temperature.  The higher the oven’s roasting temperature, the greater this residual temperature rise will be. During the slow cooking method, the roasting temperature is only 220 F and the residual temperature rise is typically only five degrees.  (A roast cooked at 450 F may rise 25 F after removed from oven and it would be well done on the outside even if the inside were rare) The oven is initially preheated to 450°F for an initial searing of the roast. If you dry age your roast for a few days in the refrigerator, this initial high heat will ensure any surface bacteria is killed. 

Remove the roast from the refrigerator 2 hours ahead to allow it to come to room temperature. Pat it dry with paper towels and cover with plastic wrap. Adjust shelves in oven. Roast will go on lowest shelf. It is best to remove the upper oven shelf to get out of the way unless it will be needed for other purpose.

Remove plastic wrap from roast, pat it dry again, and rub with ample salt. Preheat oven to 450°F. Place the roast in an oiled roasting pan, rib side down and fat side up, and insert a meat thermometer in the geometric center of the roast but insure it does not touch a bone. Roast on high for 15 minutes. Open oven door for a few minutes to dump excess heat. Reset the oven temperature to 220 F. Now roast 25 to 30 minutes per pound, depending on the size of the roast until the meat reaches 5 below the desired internal temperature. I like the meat medium rare (130-135 F). The outer pieces of the roast will be more done than the inner pieces just in case are some diehard holdouts that do not eat rare roast beef.  Let the roast rest for 20 to 25 minutes before carving. Pepper the roast.

Anything this good deserves the finest freshly prepared horseradish sauce and an excellent wine.


Notes:
  1. The roast is done when the internal temperature of the roast reaches the target temperature minus 5 degrees.
  2. Some stores will dry age your beef for free if you prepay in advance. Ask.
  3. Roast go on sale before big holidays and may be many dollars per pound discounted.
  4. I let my guest pre-mix their own horseradish sauce by purchasing a hot grind and providing a premium sour cream such as Organic Valley or make your own cream fraiche.
  5. Suggested wines: Old vine Petite Syrah, Claret, Burgandy, Cabernet Sauvignon, Zinfandel. Choose a bold fruit forward version with strong tannins.


Sunday, November 26, 2017

Holiday Roast Turkey


Recently, I revised the cooking temperature downward, to allow larger birds time to cook evenly.


Read this entire recipe 2 weeks before you need to cook the bird and once again the day before! This allows you to preview the required equipment, see the need for a defrosted bird; can get any additional equipment needed. The recipe calls for dressing. Prepare dressing a day ahead as “Turkey day” begins early because of the extended cooking time of the bird. If you plan a turkey over 22 pounds, you probably need to order one two or three weeks ahead of time. I recommend you look over the Turkey Day Menu and shopping list as well

A lady was picking through the frozen turkeys at the grocery store but she couldn't find one big enough for her family.
She asked a stock boy, "Do these turkeys get any bigger?"
The stock boy replied, "No ma'am, they're dead."


Equipment for a dressed turkey
Set of metal turkey skewers (poultry trussing lacer kit)
Kitchen string
Small pair of scissors
Heavy tin-foil
18- by 13 by 3 ½ inch roasting pan1
Dial thermometer (6~8 inches long) or
An oven thermometer (check the oven temperature)
A fat separator
A bulb baster with an injector needle or hypo-syringe and needle
Hand towels
Paper towels
Pyrex measuring cup (melting butter)
Ample supply of dish and hand-soap
Paper towels

It is a good idea to do an inventory the week before, to see if you need to buy anything you have misplaced from last year. One item I often overlook is the metal turkey skewers which I buy in quantity once every five years; I could be running out again.

If your oven temperature is not accurate, the bird will either cook too quickly or take too long. You need to check your oven temperature with a quality oven thermometer. With some experience, you can adjust the cooking time, speeding up or slowing the process, as required, by raising or lowering the oven temperature by plus or minus 30 degrees.

The best part of a roast turkey certainly isn't just the turkey.  It's all the wonderful dishes that lubricate and complement a succulent bird.  By the time the turkey is carved and nestled amongst the cranberries, whipped potatoes, giblet gravy, candied sweet potatoes, savory creamed onions, and the rest of the fixings, dinner becomes indistinguishable from gourmet cuisine. Practically nothing you do can be more catastrophic then overcooking in a turkey.  The result will be dry and the meat will disintegrate off the bones.  No recipe is foolproof because fools are so ingenious.  Close attention to detail is an asset in the kitchen. Nothing is quite as appreciated as a finely cooked bird and many struggle for years before they manage to get it right. Follow these instructions carefully and you will have success your first crack at it. Cooking the turkey to perfection is practically impossible as the rate at which the white meat and dark meats cook is not exactly the same hence, it this recipe, we do a few things to compensate but the turkey legs may be slightly less than perfect while the rest is perfect. I think this is a good compromise. The breast of the turkey remains perfectly moist and succulent while the legs are slightly chewier at (160F) than if they had been cooked to 170o F. The thigh meat is further down in the pan which seems to cook it slower than the legs. The slow cooking method insures the lower extremities of the bird get cooked properly on a really big bird. This is the method I now use, but, as a consequence, it takes longer to cook.

Planning is Important
You will need to plan your turkey day. Nominally a 25 pound bird will cook for 8 hours and 20 minutes and the bird needs 30 minutes to rest after it comes from the oven. (The formula is 20 minutes per pound.) If you plan to eat at 5 in the afternoon, the bird needs to be in the oven by 9:00 AM. This means the dressing needs to be ready by 8:30 AM when you start assembling the bird, but the bird needs to be removed from the refrigerator and allowed to come up to room temperature, about an hour. Now we are at 7:30AM. How about that first cup of coffee? So make the dressing the day before and put it in two two-gallon zip lock bags so it’s ready to go turkey morning. When you take the bird from the refrigerator also remove the dressing. (It takes about an hour to make the dressing if you have a food processor, longer if the bread crumbs are being made with a blender or longer if you only have small bowls.) Cooking time on the bag the turkey comes in may not be correct. By using a temperature probe, not only is the progress observable, but prediction of completion time. The salient point, the dressing is the measure point and the turkey is done when the dressing reaches 140oF plus ten minutes.

Birds, birds, birds
Natural turkeys, free-range turkeys, organic turkeys, processed turkeys all mean slightly different things. You need to know what you’re looking for. In the United States, the USDA web site defines the requirements necessary for a turkey to have certain designations. In the notes below, there is a link to their web site which is applicable reading. Kosher and Halal designations are not part of USDA program but are products that undergo the rigors of religious over-site by Rabbinical or Muslin supervision. Kosher turkeys and most commercially available turkeys are usually brined or have been processed with salt. Adding any additional salt will make the bird excessively salty. Read the label on the turkey! If you are on a low-salt diet, you will need to either buy a turkey not brined or soak the brined turkey for at least 24 hours in water to draw off some of the salt. It is great if you have a sink or a five gallon clean paint bucket in a cold garage. Brining makes for a better-tasting bird.  Fresh turkeys are more convenient than frozen but a lot more expensive. Typically, only the smaller birds are available fresh. The Butterball and other brands may be purchased pre-basted (injected) with chicken stock, margarine, salt and who knows what else. I don’t recommend a pre-basted turkey. When you baste your own bird you have total control over ingredient quality which is important. The tom’s birds are the biggest ones, which is what I buy.  The chicken stock could just as easily be turkey stock and home made. If making home made stock, omit any salt in the recipe. The sweet butter, likewise, has no salt. It you buy a frozen bird, it may take more than a week to defrost in the refrigerator. If you have less time, place the bird in two brown paper bags and leave it out two days in a cold place like you garage away from a hungry dog. This will jump start the defrost process. Bag the bird in several kitchen size trash bags so it will not leak and the bird can now go into the refrigerator another two days to finish.

Be mindful of Sanitation
Don’t forget to wash your hands. Clear a large section of counter space. As with handling any poultry, anything that comes in contact with the uncooked bird must be sterilized or removed to the dishwasher after its use. During the process of stuffing the bird, you may have occasion to wipe your hands on a towel. Be mindful what you have touched. Get out the dressing, melt the butter; basting needles and syringe get out the kitchen string, roasting pan, have hand-towels and paper towels handy, small pair of scissors, a dial thermometer, and the trussing kit with the metal skewers. Have the tin foil sections already out, cut to length, and available on the counter. You need a large section of tin foil for tenting the bird as it cooks, a 8 inch square to shield the front neck area where the dressing has been trussed. You need another smaller piece of tin foil to close off the main cavity dressing. I butter one dull side of the tin foil so it will not adhere to the bird during cooking. Put everything needed for preparation at easy reach including a stack of paper towels. You don’t want to have turkey hands and start handling cabinet handles, drawer pulls, or have to open the refrigerator.  Melt the butter in the microwave. Now proceed.  When the bird is ready to go into the oven, have someone open the oven door so you don’t have to do it with dirty hands else wash your hands first. After placing bird in the oven, put your hand towel(s) into the clothes washer, Wipe down the faucet, the handle to the dishwasher, disinfect the kitchen counters, and put the sponge you just used into the dishwasher. Wash your hands. Break out a fresh towel.

Pre heat oven to 225 F. ( This is the new roasting temperature that insure the most even cooking and juiciest bird.) 

Remove all oven racks but the lowest one.)

Ingredients

One 25 pound turkey (see notes for cooking time)

3 sticks of melted sweet butter (reduce to 1 ½ cups if turkey is pre-basted)
3 cups of low-salt poultry stock (not needed if turkey is pre-basted)
Cooking syringe
A bulb baster
Cooking (trussing) thread7
Heavy tin foil
Large roasting pan (see text)
If making gravy, a fat separator is handy
Thermometer (see text)
Plenty of paper towels
Trussing kit7

The turkey comes in a plastic bag. The bag is full of juices so open it the sink. Remove the giblet and neck from the cavities inside the bird. Thoroughly wash turkey with cold water inside and out rinsing until no sign of red shows in the rinse water. If the bird was supplied with a plastic insert to hold the legs together, remove and discard it. Remove and throw away any large clumps of turkey fat clinging to the skin near the rear or front openings. Keep the tail even if loose – for some this is a favorite part. If a few quills are sticking out of the bird, remove them with pliers. The loose neck skin is needed to hold the dressing the front of the bird so make sure you leave the neck skin flap intact.  Place the turkey in a large flat roasting pan1 at least three inches on each side larger than bird with sides at least three inches high. Dry the bird inside and out thoroughly with paper towels. Dry the bottom of the roasting pan of any residual liquids.
Set giblets and turkey neck aside for making the turkey stock for the gravy.

Tightly pack (see recipe for Sour Dough Apple Current Sage Dressing) dressing into neck and cavity of bird. Pin the skin of the neck area back on to the under side of the bird with the pins from a turkey trussing kit7 in 4~6 places. Try to insure that the pins avoid piercing into the main cavity of the bird else you may run your hand into one of these while fitting the dressing in the main cavity. 

Coat the bottom of the pan by brushing it with melted butter. Move turkey over the middle of pan. Fill the rest of the bird by tightly packing dressing into the main cavity. Press the initial handfuls back towards the neck opening and down into the back ribs. When the main cavity is almost filled, truss the legs by tying these tightly together with string toward the very end of the legs (1/2 inch back). 

After the legs are trussed (see picture), add more dressing between then until the main cavity is filled. Brush entire exposed outside of turkey with butter especially the neck flap area. Fold a piece of tin foil to a square to cover the neck flap area (fold of skin in the front) where the dressing is, as this easily gets done quicker and will otherwise burn. See top panel of long picture. Butter this  foil then place butter side firmly against the turkey. 

Trussing keeps the turkey together, which makes it cook more uniformly, rather than having the wings and legs dangle and become dry when finished. Make a loop of butcher string to tie the wings up and to each other. (Same loop is used for legs as wing shown in middle panel picture.) This will insure they stay close to the bird’s body. (see upper panel picture – note the string for the wings crosses straight across the front section of the bird.) 

Using the rest of the butter, inject it at a shallow angle into the bird breast, drummette (wings), thigh and leg areas. Come back and repeat with the chicken stock. The injected liquid should run out as the bird cooks so a course needle is preferred. These injections should be shallow and avoid going into the dressing cavity. Now tie the leg end tightly together. Cut off any extra string. If the tail is dangling, make a loop in another piece of butcher string, place loop around middle of tail section. Push it up, towards the legs. 

Tie the tail piece string to the leg string. Cut off any extra string. Make an open sized tin-foil “plug” for between the leg to cover dressing opening. Push it in. (See botton panel picture)

Cover breast and top of bird (tenting) with heavy tin foil. (The tin-foil helps regulate the rate the breast meat cooks.)  I fold a much larger piece in half and then make ½ side seems by folding these over on themselves, this make the foil heavier-still and allows you to more readily shape the foil to fit the contour of the bird’s topside. The foil will be placed over the top of turkey and down to the turkey legs but not tightly. You will repeatedly remove the tin foil to baste the bird so a more ridgid piece is handier. The tin foil top will be discarded the last hour of roasting to allow the bird to further brown.  I suggest using a direct indicating thermometer stuck deep in the dressing insuring that the internal temperature exceeds 140oF for at least 10 minutes. If you don’t have this type of thermometer, use an instant reading thermometer. You don’t have to worry about the bird’s temperature until the last hour or so of cooking when testing for doness occurs.

Roast at 225 F oven for the best results. If you must shorten the cooking time, raise the temperature, to 350 F but only after the first two hours.

Basting while Cooking

Basting a bird is a ritualistic enterprise at best. It allows the chef the opportunity to confirm the fact that he was diligent to turn ON the oven this time! The site of a roasting bird seems to have a calming effect which may counteract the anxiety of having Aunt Martha over who  will describe in excruciating detail every ailment she has had for the last 22 years. So if basting a bird, cook the turkey for two hours then begin basting. (You could just tell Aunt Martha your coming to baste the bird while actually refilling your egg nog.) Baste bird every thirty minutes with juices from the pan. If the color of the bird the last hour of cooking is too pale, increase oven temperature to 375. If the turkey is already looking a bit dark leave tin foil on until last half hour of cooking.

After cooking, let the turkey stand ½ hour before carving. (smaller turkeys less time) Cut off the strings to carve. Put several potholders under the narrow edge far side of the roasting pan so the juices all run to the near edge. This will allow the run-off to be easily collected toward finishing the gravy.

So Turkey day is finally here
Dad’s a basting and drinking beer
Bird’s in the oven, roasting fine
Friends are over drinking wine
No one can find the cat
Patty’s wearing a funny hat
Dog awaiting for what might drop
Children running, they never stop
Pie’s are made and properly plated
Casey’s asleep well satiated


Fixing Problems:
Sometimes the tail is not attached any longer as it became dislodged during processing. Soak a wooden squewer in water for 20 minutes, then spear the side of the turkey near the tail area, through the detached tail and through the far side taking great care that the extreamly point end does not also pierce your hand!

About Dressings
Any dressings that includes uncooked meat, seafood or fowl are potentially risky. It is really not a big deal to sauté the uncooked meat, seafood or fowl in some butter and onions before assembling the dressing which virtually eliminates any potential risk associated with cooking a dressed bird. I don’t think it in anyway compromises the quality of the dressing.
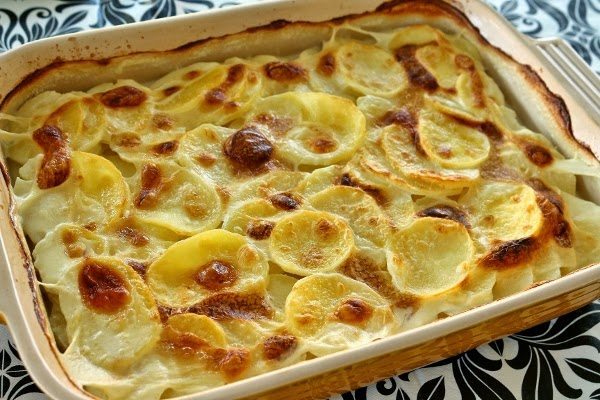

Finished Results


Notes:
  1. Roasting pan recommendations exclude a tin foil pan! First mistake with a baster will pour hot butter all over the hot interior of your oven immediately resulting in a major conflagration which may require a visit from the local fire department to quench.  If you're lucky the house will remain. A good roasting pan is NOT TEFLON coated. The nice caramelised bits do not form on teflon pans so, if gravy is more important than clean up, find a metal pan. The ideal roasting pan should have a dimension of 18 x 13 by 3 ½ inches, with vertical or with folding handles. Much larger and it will not fit in most refrigerators. Smaller sizes promote splatter while basting and may have trouble accomodating a twenty-five pound bird.
  2. Slow Thawing Turkey: Slow and 100 % safe thawing may be done in the refrigerator but  requires at least 24 hours for every 4 pounds of weight which is about a week for a 25 pound bird. Once thawed in the refrigerator, it can remain refrigerated for several days before cooking. Place the bird in a plastic garbage bag to insure it does not leak all over other food.)
  3. HEN or TOM TURKEYThe sex designation of "hen" (female) or "tom" (male) turkey is used as an indication of size rather than tenderness.
  4. KOSHER – "Kosher" may be used only on the labels of turkeys that are prepared under Rabbinical supervision. Likewise Halal is the equivalent Muslim designation.
  5. NATURAL – Turkey containing no artificial flavor or flavoring, coloring ingredient, chemical preservative, or any other artificial or synthetic ingredient and is minimally processed.
  6. for the USDA Web Site see: http://www.fsis.usda.gov/Fact_Sheets/Turkey_from_Farm_to_Freezer/index.asp
  7. Trussing Thread, kitchen thread , butcher's string – a white sanitized string, usually cotton, for trussing fowl and tieing roasts.  Sometime a short piece is included in a trussing kit which also includes a set of heavy wire skewers about 4 ½ inches long for securing the bird’s neck cavity.
  8. Cooking Time for 225F  - Starting slow is a good idea. You may increase the cooking temperature after the first two hours. Regardless of the actual time, the bird is done when the internal temperature of the bird reaches 140 F for 10 minutes. At this point, the bird has already somewhat turned a golden brown on top even if you have inadvertently have left the tin foil off. It will be golden brown to some extent when it’s at the right temperature. If the bird is at 150 F take it from the oven – it is done – avoid over cooking!
  1. Some stoves have front controls that when touched, can turn the oven off. Generally, these stoves have a means of locking the controls from accidental change. This means your plans to eat at a certain time will not be interrupted by finding out that the oven has been turned off by the three year old.
  2. Completion time: Observe the temperature rise every hour for at least  two one-hour increments. Averaging these, you can predict when the dressing will reach 140F. If that is not soon enough, increase the temperature of the oven. Recalculate. Do not go over 350F unless its the last hour and the turkey is near done but too pale.


Sunday, November 19, 2017

Olive Oil

When its priced is too low, rest assured, it is not worth buying. The good ones are expensive but worth what you pay. Taste, color and smell are the keys. Olive oil is an essential ingredient of great Mediterranean and European food.

Extra virgin oil is less that 7% acid and comes from the first pressing. The first pressing is a cold pressing. It may be filtered or not and flavor depends on many factors. Rich and easily digested, olive oil has a fruity taste and is used as a first choice by many better chefs. Air, heat, and light are the enemies of the oil so displaying your oil on the counter in a fancy clear glass container it not a good idea. The temperature you store wine is also good for olive oil just below 60 F.

Areas producing excellent olive oils are Greece, Italy, Spain, Turkey, Portugal, and California. The lighter color oils are better for frying as the have more tolerance for high heat. Do confuse this oil with one marked “LITE” as it is no longer olive oil but a combination of oils that are neither lower in calories nor as healthy.

I prefer only the most flavorful greenish unfiltered oil for dipping bread. If a recipe calls for olive oil, that means extra virgin olive oil unless it specifically say something else. Oil referred to as dipping grade tend to be tastier, high quality, and naturally more expensive.

Nothing beats your own side by side taste test, its just like learning to appreciate fine wine. What is a great oil: Simple, it is the one you like best. The highest quality is lively, bright, and full-bodied  with flavors that range from peppery to buttery depending on the variety of olives used and how ripe they are when harvested. Jump at a chance for comparative olive oil tasting as you may discover some you might otherwise come across.

According to the International Olive Council (IOC), extra-virgin olive oil must meet strict chemical and organoleptic (taste and smell) standards, including low levels of acidity and ultraviolet-light absorption. (High levels suggests poor processing or deterioration.) It has been extracted from mashed fruit by mechanical means (i.e. cold pressed) It should have at least some fruitiness and be free of defects in flavor and aroma. The standards can be found on the IOC website: http://www.internationaloliveoil.org/estaticos/view/222-standards

Some of the brands I buy are based on modest price including: Colavita, and California Olive Ranch.

divina extra virgin olive oil


colavita extra virgin olive oil


Tuesday, October 17, 2017

Summer Succotash

No longer just made with lima beans, today this dish is a colorful medley of vegetables, herbs, nuts and even chilies to provide a nice accompaniment for fish, fowl, or meat of your choice.
Homemade by Holman- Uses edamame

If you cannot find fresh fava beans, use shelled frozen edamame or baby lima beans. The salt pork adds both sweet and savory. If you like, try using crisp pork rinds (Chicharron1). Virtually any herb you like will add character including thyme, parsley, cilantro, chives, or basil. Nuts work well for another layer of texture; try pinenuts, pecan bits or toasted almonds. If you like hotter add favorite chilies. Crunch from uncooked bits of celery, mango or even cucumber are enthusiastically received.

1 Pound blanched fava beans, beans removed from pods
3 Tablespoons rendered pork lard
3 Tablespoons sweet butter
3 Cloves garlic, minced
½ Red bell pepper, chopped in ¼ cubes
2 Ears corn kernels
½ Small red potato, chopped into small cubes, cook until slightly browned
½ Vidalia onion (or shallots), minced ¼ cubes
3 Ounces salt pork, fried crisp, drained on paper towels
Sea Salt and pepper to taste
A chiffonade of basil leaves
Optional, sprinkle crushed red pepper
Optional, pine nuts

Blanch the fava beans in boiling water, cooking for 2 minute. Plunge into ice water, and, when cooled, remove and discard outer pod shells.

In a heavy frying pan, heat 3 lard then sauté salt pork until crisp. Remove to drain on paper towels. Now add onions and bell peppers sauté until onions clear. Add garlic and corn, precooked red potato and stir-fry for 2 minutes. Add the fava beans and butter, cooking an addition minute. Correct seasonings. If you like spicy, kick it up with red pepper flakes. Stir in a chiffonade of basil leaves and serve hot.

Notes:

  1. Chicharrón is popular in Andalusia, Spain, and in Latin America and other countries with Spanish influence. It is part of the traditional cuisines of Argentina.

Wednesday, October 11, 2017

How to tell if Great French Restaurant

French is more than a nicoise salad and soup with bread. These are NOT a good indication of fine French cuisine. When I am looking for Great French is expect to see classic dishes that quintessentially say the chef has mastered great cuisine. I expect to eat several courses which may or may not begin with a soup or salad. Entrees are a chance for people slow down. The main course is eaten in leisure. Variety is an essential part
Of dinning. Entrees are a chance for people to relax a bit, slow down.  The main course is not eaten in a big hungry hurry. The menu should be thoughful and today are sustainable.

Gratin-Dauphinois

It is a great sign if some or many of these appear on the menu:

Quiche Lorraine

Baked Cheese Dishes

Cheese Soufflé

Onion or leek Pie

Onion Soup

Poached Eggs

Coquilles Saint-Jacques

           Foie Gras

Salad Lyonnais

Moules Marinières

Blanquette de Veau

Ratatouille

Cassoulet of duck, goose or pork

Bouillabaisse

Escargots

Confit de Canard

Gratin Dauphinois

Oeufs en meurette (a classic dish of poached eggs in divine meurette sauce: red wine mixed with onions and/or shallots, seasoned with thyme, parsley and bay leaf and mixed with a few drops of Espanole sauce.)

Ris de veau (sweetbread)


If none of these items appear on the menu, its time to throw in the towel. Maybe you are in Malta.

It a good sign if they have a sommelier

They must have French pressed coffee on the menu. The desserts may include Apple Tarte Tatin, Clafouti, Chocolate Mousse, or Poached Pears.


How to tell if Great Italian Restaurant

Many establishments hope to lure you in with pasta and pizza mainly because they are low overhead high profit entrees. These are NOT a good indication of fine Italian cuisine. When I am looking for Great Italian is expect to see classic dishes that quintessentially say the chef has mastered great cuisine. When I am looking, the best is regional cuisine such as romano, or toscano, etc. Often the menu in Italian will be different than the one in English. Don't be afraid to order off the Italian menu with the waiters help. Many speak English. Here are some criteria for suspecting a superb dinner.

It is a great sign if some or many of these appear on the menu:

Carciofi Romano(Artichokes - roman style)
Cannelloni ala Romano
Osso Buco
Veal Piccata
Animelle (sweetbreads)
Abbacchio al Forno
Spinach Gnocchi
Frito Misto

Mellanzani al Forno

Suppli ala Telefono

Branzino

Cacciucco

Bucatini all’amatriciana

Coniglio all a Cacciatore

Fettucine Alfredo (popular with Americans mainly)

Puntarelle (Chicory - anchovy sauce)
Oxtails


If none of these items appear on the menu, I am pretty sure this is some American Restaurant that maybe mediocre or perhaps not really Italian.


High-end places may include:

Chianina Beef - Bistecca alla Fiorentina

Aragosta Americana

Roman Entrées on the menu are a very good sign that you should try the offerings. Some of these might be bread soup, panzanella salad, puntarelle salad, fried zucchini blossoms, mellanzani (eggplant lasagna)

It a good sign if they have a carafe of excellent house wine. (Want to see an excellent roman menu where the menu changes for each day of the week, try http://feliceatestaccio.it/roma/ )


They must have espresso and cappuccinos on the menu. The desserts may include zabaglione, Panna cotta, and tiramisu. They should offer a digestive alcoholic drink, such as Limoncello, amaro, or grappa


Sunday, October 1, 2017

Frijoles Negros- Black Beans

A staple of Mexican cuisine  Frijoles negros are easy to make, a great side dish to any Mexican meal or a filling for black bean burritos. One cannot compare the results of homemade to those that come from a can. Black beans do not need to be soaked.


1 Pound dried goya black beans
1 Spanish onion,chopped
2 Cloves garlic, crushed
1 Teaspoon dried oregano
1 Teaspoon dried summer savory3
Optionally, Aji Dulce, chopped1
4 Bay leaves
1/2 Teaspoon crushed red pepper
2 Tablespoons flavorful rendered pork lard
2 Sprigs of dried epazote2 (6 inch long) added the last 30 minutes of cooking
½ Sweet onion, chopped finely added the last 10 minutes of cooking
Salt and pepper to taste
Added as a garnish, Chopped cilantro


Notes:
  1. Aji Dulce looks just like the fiery red habanero, but without the heat! Fruits grow to 1.5", with a wrinkled skin, just like the habanero. Retains the fruity flavor of the habanero making this pepper extremely popular in Central and South America for dishes needing that classic habanero flavor without its sometimes overpowering heat. 
  2. Epazote (akaWormseed) is an annual herb, native to tropical regions of Central and South America Its green jagged leaves emit aromas of petroleum and citrus while its flavor is pungent, lemony with a sharp finish that increases with age. Epazote is used in many traditional Mexican dishes (especially in Yucatecan dishes.) including tamales, mole de olla, salsa, traditional black beans, pinto beans and enchiladas. It is also a carminative, which means it reduces the gas associated with beans. To maximize flavor, the herb is added during the last 30 minutes of cooking.
  3. Summer savory is an herb that belongs to the mint family. It is the dark green, narrow leaves of a bush grown widely throughout Yugoslavia and the United States. Savory is one of the most versatile herbs and enhances almost every dish from soups, stews and bean dishes to succotash, cabbage and sauerkraut.


1. Aji Dulce - Sweet Chillies


Aji Dulce Sweet Habanero - A True Venezuelan Heirloom Pepper


When we mention “Aji” we naturally think of Peru the origin of many South American chiles  but today, Venezuela is supplying a seasoning pepper with a Sweet Habanero flavor. Ají dulce (South American Spanish ají, "chili" + Spanish dulce, "sweet"), aji cachucha or ajicito, is any of a variety of sweet perennial peppers found in Latin America and the Caribbean. It is most widely known in Venezuela, where it refers to a specific native variety of Capsicum chinense related to the habanero, but with a much milder, smoky flavor. In the english speaking Caribbean it is known as Seasoning Pepper and essential for a variety of traditional dishes. Taste: Sweet, spicy and pungent, absolutely delicious, with only a mild trace of heat! This is a fruity pepper with a sweet, spicy flavor without the heat.

Aji Dulce  Pepper #1


The rarer of the main aji dulce's, this variety bears flattened, pendant shaped pods that ripen to red. The wrinkled pods look like habanero's, but lack the heat. Flavor is very mild, with a little bit of heat, but with an aromatic and unusual taste that combines fruit and spice. The plants themselves bear well and are very ornamental when in fruit.


Aji Dulce  Pepper #1


Aji Dulce  Pepper #2

(Capsicum chinense) 15 seeds per pack. Looks just like the fiery red habanero, but without the heat! Fruits grow to 1.5", with a wrinkled skin, just like the habanero. Retains the fruity flavor of the habanero making this pepper extremely popular in Central and South America for dishes needing that classic habanero flavor without its sometimes overpowering heat. 

Aji Dulce  Pepper #2


Friday, September 29, 2017

Cream of Celeriac Soup


A seasonal winter soup to start a great meal.
 
The Fleming 55 Play d'eau. Beaucette Marina, Guernsey,  Channel Isls

3 Tablespoons sweet butter
1 Celeriac, peeled and cubed
1 Potato, peeled and cubed
1 Leek white section, trimmed, washed and roughly sliced
3 Shallots peeled and roughly chopped
1 Clove of Garlic, chopped
2 Cups homemade chicken vegetable stock
1 Cup heavy cream
White pepper and sea salt to taste
Lemon juice to taste
Chopped chives and a splash of Crème Fraiche for garnish

Trim the celeriac and remove the outer layer of skin. You only want the white flesh. Use caution as this root is tough and requires a sharp knife to cut it. 

Melt the butter in a large, thick bottom pot over a medium heat. Add the celeriac, leek, potato, garlic and shallots, sauté vegetables until they are starting to soften approximately 10 minutes.
Add the stock; bring the soup just to a low boil, then simmer covered until the celeriac is completely tender.
Use a post blender to smooth the soup. Reheat before serving adding cream and correct seasonings. Garnish with fresh chopped chives.


Sunday, September 24, 2017

Haricots Verts French Green Beans

Haricots Verts are longer, thinner than American green bean varieties and tenderer and have a more robust flavor.

Haricots Verts are not the same as immature American green beans. They have a full green bean flavor early in their development and are tender at a thin size, unlike American green beans, which are much thicker and not tender until the latter stages of bean growth. The string bean was an ancestor of the American green bean and today these commercially grown green bean varieties lack strings.
Recipes vary, but steamed (or briefly blanched in boiling water) and sautéed in butter and garden fresh herbs (and or garlic) is common. These are also often served cold in vinaigrette.

1 ½ Pound thin green beans (haricot vert), ends trimmed                                                 
¼ Cup shallot, chopped fine                                                                       
3 Tablespoons unsalted sweet butter or 50-50 with olive oil                                        
1 Tablespoon chopped parsley                                                                          
1 Tablespoon fresh chopped thyme or lemon thyme 
2 Tablespoons chopped tarragon

Optionally, 8 ounces freshly toasted cashews  

Sea Salt and white pepper to taste                         

                                                                                      
Trim Haricot Vert, place in a bowl of cold water, place bowl in refrigerator until ready to cook (at least an hour). Steam Haricot Vert in a steamer for three minutes then sauté in butter with fresh herbs until tender. Add nuts and season to taste.